Making Natural Fertilizer from Kitchen Scraps
As awareness of sustainable living increases, many people are looking for ways to reduce waste and repurpose their kitchen scraps. One of the best ways to do this is by creating natural fertilizer from leftover food items.
As awareness of sustainable living increases, many people are looking for ways to reduce waste and repurpose their kitchen scraps. One of the best ways to do this is by creating natural fertilizer from leftover food items. Not only does this practice reduce waste going to landfills, but it also enriches your garden soil, promoting healthy plant growth without the need for synthetic fertilizers.
The Benefits of Making Natural Fertilizer
1. Reduces Food Waste
According to the Food and Agriculture Organization, nearly one-third of the food produced globally is wasted. By reusing kitchen scraps to make natural fertilizer, you spin waste into a resource, promoting a more circular economy and acting responsibly toward the environment.
2. Enriches Soil
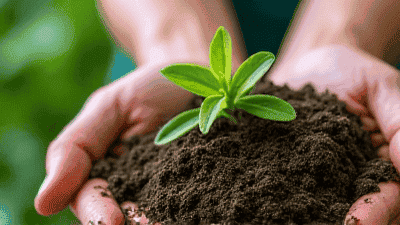
Natural fertilizers contribute essential nutrients back into the soil, promoting healthy plant growth. They improve soil structure, enhance water retention, and encourage beneficial microbial activity. This leads to healthier plants and a more vibrant garden.
3. Reduces Chemical Use
Using kitchen scraps as natural fertilizer can significantly reduce or eliminate your reliance on chemical fertilizers. Chemical fertilizers can harm beneficial microorganisms in the soil, pollute the water supply, and contribute to environmental degradation.
4. Saves Money
Creating your own fertilizer from kitchen scraps is cost-effective. By recycling food waste, you minimize the need to purchase commercial fertilizers, making gardening a more economical endeavor.
5. Promotes Bio-Diversity
Natural fertilizers foster a diverse ecosystem in your garden. By feeding soil organisms, you create a healthy environment that supports plants, insects, and other wildlife. This biodiversity leads to a more resilient garden.
What Kitchen Scraps Can Be Used as Fertilizer?
Before you begin making your own fertilizer, it’s essential to know which kitchen scraps are beneficial for your garden. Here are some top scraps to consider:
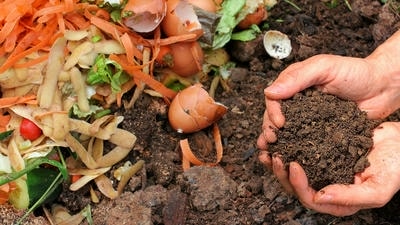
1. Vegetable and Fruit Scraps
Vegetable and fruit scraps are among the best ingredients for natural fertilizer. These scraps are rich in nitrogen and other essential nutrients that contribute to soil health. Some examples include:
- Peels from vegetables (potatoes, carrots)
- Core and skins from fruits (apples, pears)
- Leafy greens (lettuce, cabbage)
- Overripe or spoiled fruits
2. Coffee Grounds
Coffee grounds are an excellent source of nitrogen, making them a fantastic addition to natural fertilizer. They also improve soil structure and enhance drainage. Just remember to use them in moderation, as too much can potentially lead to soil acidity.
3. Eggshells
Eggshells are rich in calcium, which is essential for preventing blossom-end rot in tomatoes and other plants. Simply rinse them and crush them before adding them to your compost or garden.
4. Onion and Garlic Scraps
Onion and garlic scraps not only contribute nutrients but also have natural pest-repelling properties. The sulfur compounds found in these foods can help deter some garden pests.
5. Stale Bread
Stale bread can be composted and broken down into valuable nutrients for your soil. Just break it into small pieces to speed up the decomposition process.
6. Nut Shells
Crushed nut shells can improve soil aeration and drainage. However, be cautious with walnut shells, as they contain juglone, which can be toxic to some plants.
7. Herbs and Spices
Old herbs and spices that are no longer fit for culinary use can be incorporated into compost. They contribute nutrients and help deter pests due to their strong scents.
Methods of Making Natural Fertilizer from Kitchen Scraps
There are several ways to turn your kitchen scraps into natural fertilizer. Below, we will explore a few popular methods: composting, vermicomposting, and making compost tea. Each approach has its advantages, so you can choose the one that best suits your needs and space.
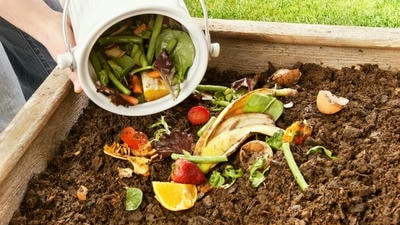
1. Composting
Composting is the process of decomposing organic matter into a nutrient-rich soil amendment. It requires creating a balance of “greens” (nitrogen-rich materials) and “browns” (carbon-rich materials).
How to Start Composting:
- Choose a Compost Bin: Select a compost bin that suits your space. You can purchase a pre-made bin or create one from a wooden pallet or chicken wire.
- Layer Your Materials: Begin with a base layer of browns (such as dried leaves, cardboard, or straw). Then alternate layers of greens (kitchen scraps, grass clippings, and coffee grounds).
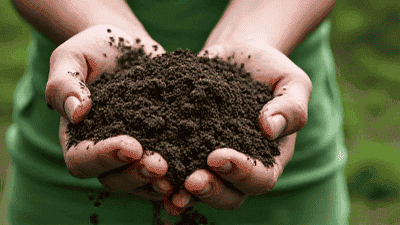
- Maintain the Pile: Turn the compost pile every few weeks to aerate it and speed up decomposition. The compost is ready when it resembles dark, crumbly soil and smells earthy.
Tips for Successful Composting:
- Avoid adding meat, dairy, and oily foods, as these can attract pests and slow the composting process.
- Keep the compost pile moist but not soggy. If it becomes too dry, add some water; if it is too wet, add more dry materials.
2. Vermicomposting
Vermicomposting is a method that utilizes worms, particularly red wigglers, to break down kitchen scraps into nutrient-rich worm castings. This method is ideal for those with limited outdoor space or who want to compost indoors.
How to Start Vermicomposting:
- Get a Worm Bin: Choose a container with a lid and drill holes for ventilation. You can use several layers of newspaper or cardboard at the bottom for bedding.
- Add Bedding: Shred newspaper or cardboard and moisten it. Fill the bin about halfway with this bedding.
- Introduce Worms: Purchase red wigglers from a reputable source. Add them to the bin along with small amounts of kitchen scraps.
- Feed the Worms: Add food scraps like vegetable peels, coffee grounds, and crushed eggshells. Avoid adding citrus, onion, and garlic, as these can be harmful to worms.
- Harvesting Castings: After a few months, the worms will have converted the scraps into worm castings, a potent natural fertilizer. Simply move the bedding to one side of the bin and add new bedding and scraps to the empty side. Harvest the castings from the side where the worms are not.
Tips for Successful Vermicomposting:
- Keep the bin in a cool, dark place, and maintain a balance of moisture – it should feel like a damp sponge.
- Regularly monitor for odors; if unpleasant smells arise, the bin may be too wet or have too much acidic food.
3. Compost Tea
Compost tea is a nutrient-rich liquid made by steeping compost in water. It’s an excellent way to quickly deliver nutrients to your plants.
How to Make Compost Tea:
- Gather Materials: You will need well-aged compost, a bucket or barrel, and water (preferably non-chlorinated).
- Combine Ingredients: Fill the bucket with a few cups of compost and top it with water. Let it sit for 24 to 48 hours.
- Stir Occasionally: Stir the mixture occasionally to aerate it, promoting the growth of beneficial microbes.
- Strain and Use: After steeping, strain the mixture through cheesecloth or a fine mesh strainer. The resulting liquid is compost tea, which can be diluted with more water and used to water plants as a natural fertilizer.
Tips for Making Compost Tea:
- Use the tea within 24 hours for maximum effectiveness.
- Avoid using finished compost tea on seedlings or newly transplanted plants, as it can be too strong; dilute it further for delicate plants.
Applying Natural Fertilizer in Your Garden
Once you have created your natural fertilizer, knowing when and how to apply it is crucial for achieving the best results.
1. When to Apply
Spring and Fall: These are ideal times to apply natural fertilizers as plants begin their growing cycles. In spring, use it to give plants a nutrient boost, and in fall, apply it to prepare the soil for winter.
During Planting: When planting seeds or young plants, mix natural fertilizer into the soil to give them a strong start.
2. How to Apply
Direct Application: Spread cured compost or worm castings directly onto the soil surface. Lightly till or rake into the top few inches of soil for best results.
Liquid Fertilizer: Use compost tea to water your plants. Apply it every few weeks during the growing season, especially when plants are flowering or producing fruit.
Top Dressing: For established plants, add a layer of compost or worm castings around the base as a top dressing. This will slowly release nutrients as it breaks down.
Taking Care of Your Garden
Maintaining healthy soil and plants requires ongoing care. Here are some essential tips:
1. Rotate Your Crops
Crop rotation helps prevent soil depletion and reduces the chance of pest infestations and diseases. Plan your garden layout to rotate crops, especially heavy feeders like tomatoes and peppers.
2. Mulching
Apply a layer of organic mulch (straw, wood chips, or grass clippings) around your plants to retain soil moisture, suppress weeds, and improve soil quality as it breaks down.
3. Monitor Plant Health
Keep an eye on your plants for signs of nutrient deficiencies or pest infestations. Adjust your care routine or supplemental fertilization as needed.
4. Record Keeping
Maintain a gardening journal to track your planting dates, fertilizer applications, and plant growth. This information will help you make better decisions in future gardening cycles.
Conclusion
Making natural fertilizer from kitchen scraps is a simple yet effective way to promote sustainable gardening practices. By transforming waste into valuable nutrients, you can enrich your soil, reduce your environmental footprint, and produce healthy plants, all while saving money on chemical fertilizers.
With a little creativity and some beginner-friendly composting techniques, you can turn your kitchen waste into a resource that benefits both your garden and the planet. Embrace the joy of reusing kitchen scraps and experience the health benefits of happier plants and a thriving garden.